

Warhammer 40k How To Use Transfer Sheets
Do yous desire to apply decals to your miniatures or scale models? Decals add actress details to your wargaming miniatures. If you lot're looking for realism, or a more immersive look for your Warhammer 40k vehicles, infinite marines, or historical wargaming pieces, learning how to apply transfers tin aid. Many model kits come with water transfer decals, but they tin exist challenging to apply properly. Most decals are printed on waterslide decal newspaper and crave some dedicated hobby skill and patience to transfer to your miniature. This is especially true when you want to adhere the decals without wrinkles or bubbles over uneven, curved surfaces.
In that location are many recommended ways to apply decals and warhammer transfer to models.
This article shows you lot how I apply decals on wargaming miniatures. Cheque out this unproblematic tutorial for how to use transfers and apply wet slide decals to Warhammer 40k models, such space marines.

Hither'south the procedure of applying a decal in ix elementary steps with some tips. You can apply the uncomplicated tips here for almost any decal application you may need for other models. It'southward worth the attempt!
Stride 1 – Plan
The beginning step to applying decals to your models is to plan.
Yes, plan out what decals you desire AND where you want them to get. If you're looking for a more realistic expect for your miniatures, so think carefully nigh what your decals are showing. Just as you plan out your paint color scheme, decide how many and what logos/icons/symbols you want on your models.
A fundamental tip is non to use too many decals.

Every decal should practise something, tell something almost the context of where your model exists in the world they live in. If this is a historical miniature, decals may a elementary country's national flag or a complicated mural.
Too, you should know beforehand when you should utilize the decal when you're painting the model. Don't finish painting a model and then decide it needs decals.

For a more realistic look, decals should also look "painted-on". Decals should fit into the paint scheme, non pop-out of it. Following this guide will show you lot where in the painting process I decided to employ the decal.
Step 2 – Follow instructions
Many model kits come up with water slide decals. And, if you're going with a reputable model company like Games Workshop, these decals will also come with instructions in the packet.
(Yeah, sure you lot can go online to discover out how others do information technology…. that works, too)
When you expect at the dorsum of your decal sheet, you may notice the printed instructions.
Looks piece of cake, right? Take a look carefully.
At that place are subtle details you should consider. For example, how closely you cut out the decal on the sail determines how big the actual "sticker" volition be. The larger the decal, the more than chance you accept of it wrinkling or forming bubbles.

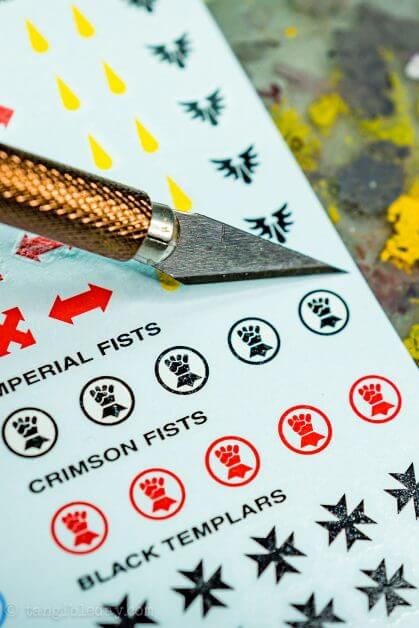
Footstep 3 – Cut out decals from the warhammer transfer sheets, carefully
In my case, I want to apply the Majestic Fist symbol on the shoulder pad of my Primaris Inceptor Space Marine.
With the correct decal sail, I establish the decal symbol I was looking for.
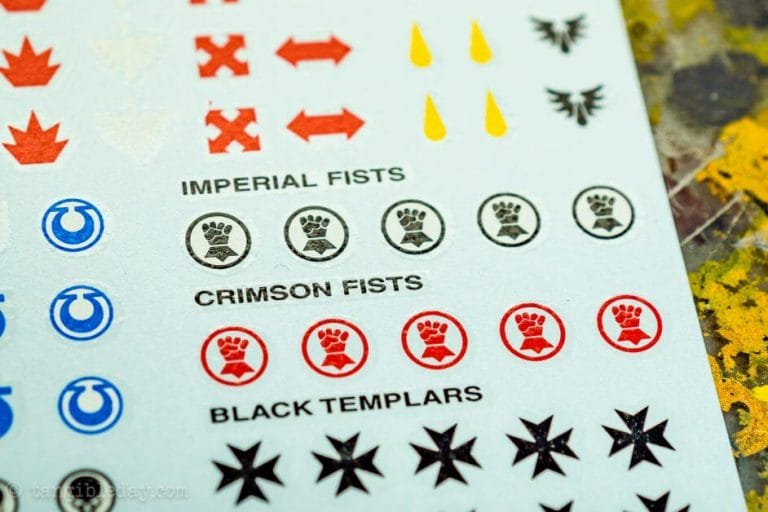
And, looking at it, I find skilful news.
Notice how the decals are round (significant the sticky part is limited to a circle shape)?
This means that I don't need to worry about cutting out the specific shape of the decal. All I need to do is cut them out from the principal sail. I don't have to cutting a specific shape.
Using a sharp hobby knife, I cutting out the decals I wanted. I needed 3 decals for my Space Marine Inceptor unit. One for each model.
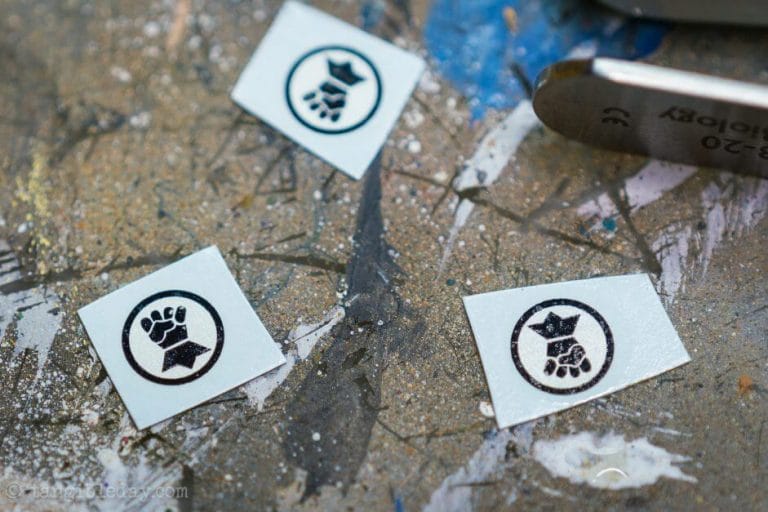
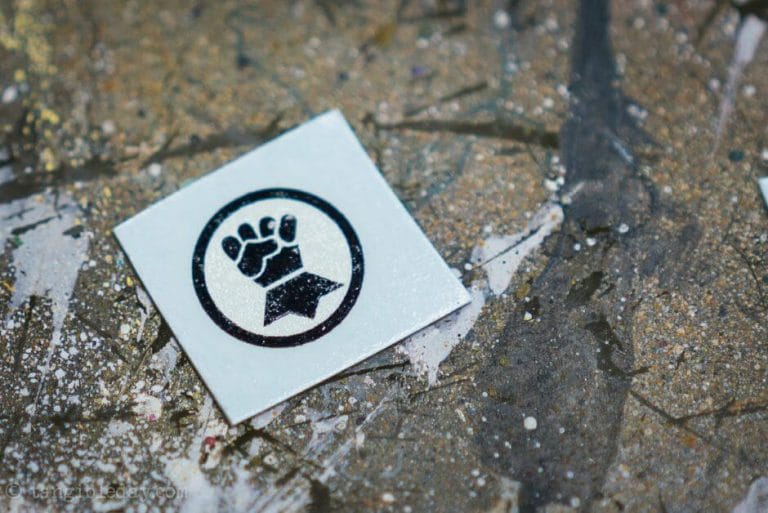
I closely examine each decal to make sure they are in skilful condition. They've been in storage for a while.
Step 4 – Prepare the model surface
At this point, you should have already painted your model. This includes the surface that you want to utilise the decal on.
Some people like to varnish the model earlier applying decals they cut from the warhammer transfer sheets.
A clear gloss coat can assistance even out any modest surface bumps that could interfere with your decal. Just, calculation a varnish on a small-scale model at this point could also obscure surface item.
I prefer not to varnish before applying decals. I want my decals to look "painted-on". This adds realism in my eyes.
To make certain my decals adhere properly and molds itself to the surface of my miniature, I utilise a model decal solution.
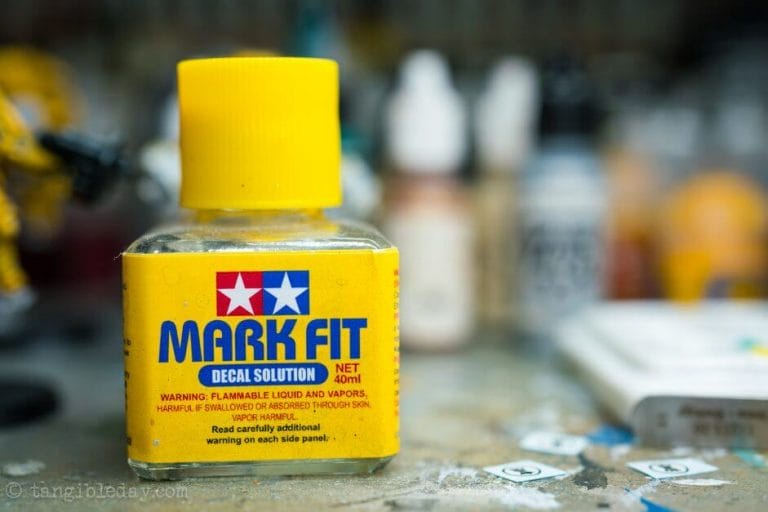
A decal solution works past softening the decal. In fact, all decal softeners reduce the rigidity of decals and so they conform to the surface and texture they rest on.
For all-time results, I follow Tamiya'south instructions for using the Marker Fit decal solution.

The bottle comes with a brush in the cap. I used the castor to utilize decal solution on the bare painted shoulder pad. I brush on a liberal amount of the solution, but I make sure it doesn't drip.
Allow the decal solution to dry.
Step 5 – Moisture the newspaper decal
While this is happening, I place the cutting-out decals in a pot of clean h2o.
I hold the decal using tweezers (ever useful to have) then it doesn't float away or sink to the bottom of the pot.

Go on an eye on the paper decal. If you walk away for too long, the decal may automatically slide off the newspaper and sink into your water pot. If that happens, information technology can be a pain to discover the decal and retrieve it without dissentious the decal.

Later most 20-30 seconds, you tin pull the soaked paper decal out of the water.
Place the decal on a flat surface and utilise a make clean, small brush to carefully remove/slide the decal off from the paper backing.

Step six – Apply the decal
To apply the decal, first moisture the model surface with water.
Or, in my case, I really want the decal to curve around the shoulder pad equally much every bit possible. That means the decal needs to be soft.
I apply a liberal amount of the decal solution. Using a brush, I lay the decal onto the shoulder pad.
RELATED: A MAGNIFYING LAMP CAN Assist Yous WITH APPLYING DECALS

At this point, many of you lot may exist frustrated because the decal won't stay in place (it floats and slides), or wrinkles.
In the first case, if your decal is floating effectually, then all yous need to practise remove some moisture from the decal.
Dab the edge with a cotton swab or the corner of a piece of tissue paper.

Getting a decal to bend along a round surface, like a infinite marine shoulder pad is really mutual problem.

Are yous frustrated by decals not sitting properly on your models?
Try these tips:
- If your decal is wrinkling besides much (equally mine did), locate a very sharp pocketknife and slice into the decal along the contraction. The cut warped edges should sink back downwardly into the decal solution on the model surface.
- The fundamental hither is to use a pocketknife with a super sharp edge. This will allow you to printing the knife edge into the decal to cut it. Don't piece or saw. Simply press into the decal to make the cutting.
- Use a small castor to move the cut edges into identify. Make sure the surface remains wet the entire time.
For larger decals, or surfaces that curve a lot, you lot can make multiple cuts into the decal. Retrieve to keep the surface moist so the decal doesn't stick. You want to be able to slide the decal around the surface until yous're ready to seal it down.
Optional step: You tin can reapply decal solution over the superlative of the decal to soften it even further. Repeatedly calculation decal softening solution can help you get the decal to conform neatly with your model's surface. Of course, exist conscientious. Some decal softeners tin can actually melt the plastic decal and surface underneath. Go slowly and work in steps.
Step 7 – Dry the decal
When yous're satisfied, dab the tiptop of the decal with a cotton wool swab or tissue newspaper. Gently remove as much moisture as possible.

If you realize that the decal isn't sitting in place the mode yous like, yous tin apply more than decal solution or water on height. Give the decal some time to absorb that moisture and try and gently maneuver the decal into the right place.
Before moving onto the next step, it is important that the decal is fully dry.
Pace 8 – Seal the decal
There are many ways to seal and protect the decal.
Some people utilise clear coat varnishes. Others apply matte sealers.
For realism and that "painted-on" wait for my decals I employ a brush-on Testors Dullcote matte varnish.
RELATED: BEST WAYS TO Apply MATTE VARNISHES ON MINIATURES
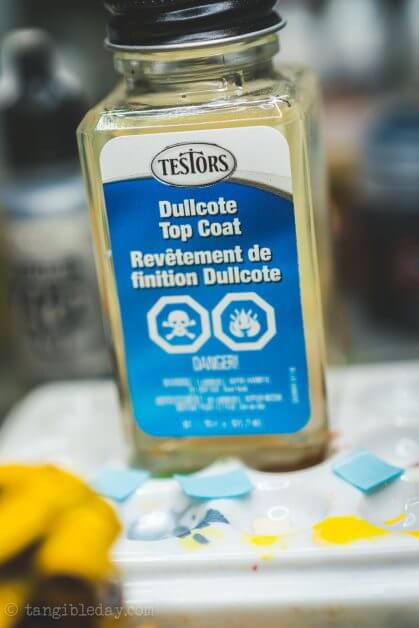
To employ this brush-on matte varnish here's what I do:
- Shake the bottle well to mix the varnish solution
- Use a cheap, soft constructed brush and apply varnish onto the decal
- Make sure the varnish is evenly practical
- Don't allow the varnish puddle
- Don't brush as well much to avoid streaks

For all-time results when you varnish your decal, work in sparse layers. Utilise a coat of matte varnish (soak upwardly the excess), and permit it dry completely. Add two-iii more coats, waiting for each coat to dry out before applying the side by side.
Some people utilize a hair dryer on the everyman ability setting to speed upwards the procedure. I don't recommend information technology at this stride since you could accidentally blow the decal out of place.
Check out the example showing what decals look like before and after a few coats of varnish.


Footstep 9 – Terminate painting your model
At this signal, yous can likewise exercise a few things to brand the decal look more than like it was painted on the model.
You can "chip" the decal, where you lot literally scratch the decal, exposing the paint underneath. Use a sharp needle, or the tip of your hobby knife. Alternatively, you lot can paint the chips and battle damage directly on top of the decal.

These pocket-sized details tin help tie-in your decal with the rest of your painted miniature.
If you're using a launder (i.e., acrylic or oil launder) or shade, brand sure you dab of the excess from around decal to make certain it doesn't go "outlined" by the darker wash pooling in the recesses (formed past the decal edges).
When you're finished, requite the entire model an even glaze of a matte spray varnish. This will fifty-fifty out the reflectiveness over the whole model.


Summary
Here are the 9 steps for how to apply a realistic-looking decal on your miniatures:
- Plan
- Follow instructions
- Cut out decals from the transfer sheet, carefully
- Prepare the model surface
- Wet the paper decal
- Employ the decal
- Dry the decal
- Seal the decal
- Finish painting your model
I hope this tutorial was helpful. These tips and steps for applying decals volition be useful for a wide range of models. Information technology volition accept practice and a good for you dose of patience to get decals to look right. But, once you get used to the workflow, I retrieve the last result is worth the effort.
Decals add the extra detail that can bring more life to your miniatures.
Happy modeling!
Enjoying your visit? Join Tangible Day
Free newsletter with monthly updates (no spam)
Go out a comment below! Follow on Twitter, Instagram, and Facebook.


Warhammer 40k How To Use Transfer Sheets,
Source: https://tangibleday.com/how-to-apply-warhammer-space-marine-decals-tips/
Posted by: davidsonnoby1984.blogspot.com
0 Response to "Warhammer 40k How To Use Transfer Sheets"
Post a Comment